.png)
2026-03-19 Release Notes
OnTarget Desktop Release Notes
Residential Midnight Shift Clock Out Support
Residential Shift Extended Clock Out
OnTarget has enhanced the clock‑out functionality for residential shifts scheduled to end at 11:59 PM, enabling users to clock out after 12:00 AM on the following day. As part of this enhancement, the availability of the Clock Out button within the OnTarget desktop application is extended beyond the original scheduled shift end time of 11:59 PM.
Additionally, a new configuration option has been introduced that allows administrators to enable or disable this functionality. This setting, titled “Allow Shift Schedule Midnight Clock Out Extension,” is located within the Timeclock Rules list configuration (Configure > List Configuration > Timeclocks > Rules).

The duration for which the Clock Out button remains available after an 11:59 PM shift end time is determined by the configured “Number of minutes after end of shift to allow clock out” setting. When this functionality is enabled, the Clock Out button becomes available at 12:00 AM on the following day and remains accessible for the total number of minutes specified in the configuration.
Please Note: If a user does not clock out before the extended clock out time expires, a manual timeclock entry / update is required.
Extended Clock Out Availability
When the “Allow Shift Schedule Midnight Clock Out Extension” setting is enabled, users assigned to a residential Shift Schedule with an end time of 11:59 PM are permitted to use the extended Clock Out functionality.
For the extended Clock Out button to be available, the following conditions must be met:
- The user must have clocked in for the residential shift prior to 11:59 PM.
- The user must not have clocked out for the residential shift before 11:59 PM.
- The user must not be scheduled a residential shift beginning at 12:00 am the next date for the same residential site.
If a user remains clocked in after the scheduled 11:59 PM shift end time, the extended Clock Out button becomes available after midnight. To ensure clarity, the button displays the user’s original clock‑in time from the previous date.

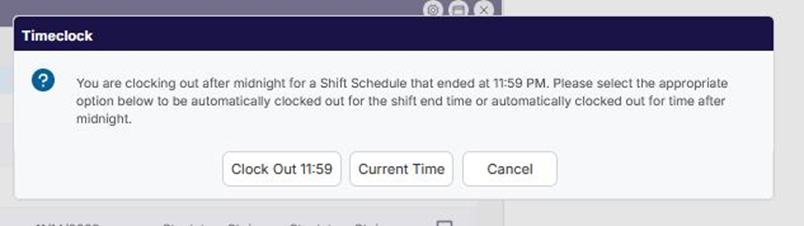
When a user selects the extended Clock Out button, they are presented with three options to ensure the appropriate clock‑out time is applied. The available options are outlined below:
-
Clock Out 11:59
Although the extended Clock Out button is accessed after 12:00 AM, selecting this option records the user’s clock‑out time as 11:59 PM for the original shift.
-
Current Time
Selecting this option initiates a process that clocks the user out of the 11:59 PM shift and automatically creates a new shift beginning at 12:00 AM. The user is automatically clocked in to the newly created shift and subsequently clocked out at the current time, which reflects the moment the extended Clock Out button was selected.
-
Cancel
Selecting this option cancels the operation. The user remains clocked in, and no clock‑out action is recorded for the shift ending at 11:59 PM.
Please Note: The newly created shift (Flex Shift) is set to contain a start time of 12:00 am and an end time based on the configured number of minutes in which a user can clock out after the scheduled end time.
Automated Process – Flex Shift Creation and Clock In / Out
Selecting the option of “Current Time” when clicking the extended Clock Out button initiates a process that completes the following:
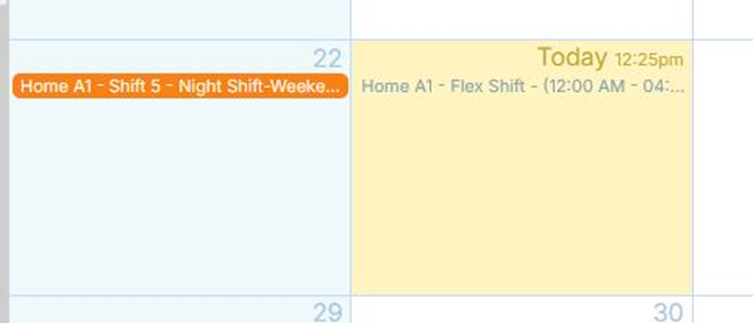
· A new shift schedule is automatically created for the next date and within that created shift schedule a Flex Shift is added. The start time of the added Flex shift is 12:00 am and end time is the total number of minutes configured for the allow time to clock out after the scheduled end time.
The added Flex Shift is displayed within the Schedule Calendar.
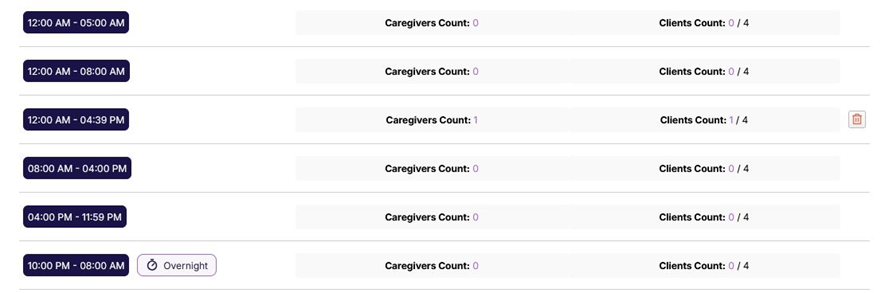
Opening the created Shift Schedule provides access to view the details for the created Flex Shift.
· The user is automatically clocked out for the shift ending at 11:59 pm.
· The user is automatically clocked in at 12:00 am for the newly created Flex Shift.
· The user is automatically clocked out at the time in which the extended Clock Out button was clicked.
Please Note: The automated clock in / out portions of the process appropriately logged the user location information. This is based on the location in which the user clicked the extended Clock Out button.

Target Population Visibility on Service Notes
A new Note Template configuration option has been introduced to allow Target Population data from the client record to be displayed within service notes. When this configuration is enabled, the Target Population information is visible exclusively within service notes and is also included in the associated DMS record.
This feature can be enabled within the Note Template configuration. Administrators may activate the setting during the creation of a new Note Template by selecting the corresponding checkbox.
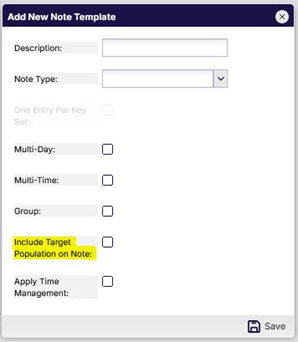
Within the Note Template configuration grid, users can easily verify whether this configuration is enabled or disabled.
· A No value indicates that the configurations is not enabled.
· A Yes value indicates that the configurations is enabled.
Please Note: The Note Template configuration cannot be edited once saved and listed within the Note Template grid.

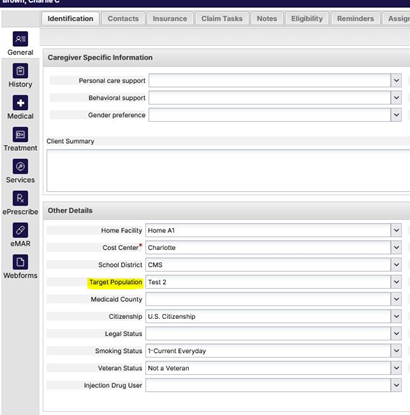
When Target Population is enabled for a Note Template used in service note creation, the corresponding Target Population data is displayed within the service note and included in the associated DMS record. The value populated in the Target Population field is sourced directly from the Target Population field on the related client record.
The Target Population field is located within the service note as the first field below the header. As noted, the field within the service note is read-only.
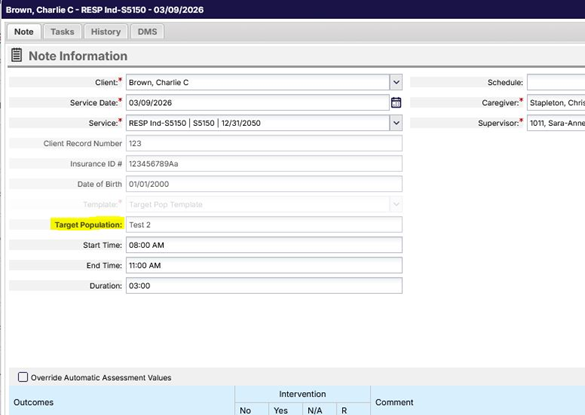
Similarly, after the service note is signed and the corresponding DMS record is generated, the Target Population field is displayed immediately below the header.

Service Record Update for 837 Claim File Content
OnTarget has updated the Service record configuration to include Content Required data fields for specific services that require additional information to be included in the 837 claim file. When the applicable note fields are completed, the system automatically populates the corresponding content within the 837 claim file for the service.
Please note: Configuring these additional fields for a service that does not require the associated 837 content may result in claim denials.
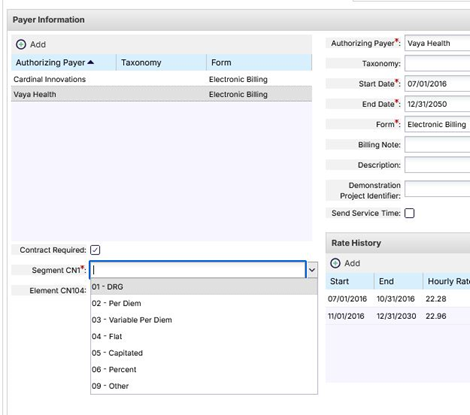
Within the Service record, a new checkbox labeled “Contract Required” has been added to the Payer section, located directly below the Payer selection field. When this checkbox is enabled, additional configurable fields are displayed.
The newly available fields include:
-
Segment CN1
This is a required field and includes a dropdown list of selectable options.
-
Element CN104
This field is optional; however, completion may be required depending on the specific service and payer selected.